
Traversing Iceland from its one shore to the other is a kind of the Holy Grail of the Icelandic adventure for some travellers. It is the biggest and the most difficult thing you can do in terms of hiking on Iceland. Every year hikers cross this country, mostly walking north-south.
Some of them simply want to go from one shore to the other. Others decide to start from the northernmost point of land and reach the southernmost. The east-west crossings are much rarer, although this direction is also chosen by some enthusiasts.
There are a few routes which you can choose to cross Iceland. They differ in terms of their length and direction. By crossing the island I got to know the east-west route but in this article I have also gathered experience of other people.
General rules of hiking through Iceland remain the same, no matter which route you choose. North-south, east-west – the terrain and the dangers are similar. But their accumulation and different logistics, as well as the length of such a crossing, make the difference. The basic question is:
Iceland Traverse – which route to choose?
You can choose from:
- North – South,
- East – West,
- The diagonal.
Each direction may have its variations. In practice your route will be significantly limited by glaciers and rivers. The nature is the main factor on your way through the island. Even in good weather the route, which you’ve planned, may turn out to be impassable due to e.g. flood. It will automatically force you to look for a crossing and will limit your choice.
You can work out your own variant of the route, however in reality it will follow one of roads or trails, that are leading across the Iceland’s highlands. You can find an sketch (and only a sketch it is!) on the map below.

The main “corridor” through Iceland is the north-south traverse, running along the F26 road which cuts the island in half (variant no. 2). It is a comfortable and popular, ca. 350-400-kilometre-long route and it is the most popular way of crossing Iceland. You can start in any point of the north shore. The area of the city of Akureyri and Myvatn Lake is the most popular.
Variant no. 1 is also possible – it is significantly longer (500-600 km) and it connects the extreme points: Rifstangi on the north and Kotlutangi on the south. It leads through the wilderness on the north, than reaches the F88 road and Askja volcano. This option is much longer, more difficult and you will come across a few adventures: ford on the rivers and lack of water in the area between Askja and Kistufell shelter.
Variant no 3 is a traverse of the western Iceland. The route is generally easy, leading partly along F35 road.
The east-west traverse is done much less often and it’s more difficult. It is not much longer: you can connect east and west shore by walking 600 km. However, it means going through a difficult eastern fiords and, after entering the highland, it requires dodging between the glacier rivers. The three biggest glaciers of Iceland: Vatnajokull, Hofsjokull and Langjokull are the source of many huge rivers, that run south-north to the Arctic Ocean. By going from the east to the west, you must cross them, which means searching for passes and bridges. Especially the middle of Iceland, the northern and southern sides of Hofsjokull are often impassable in summer due to the very mighty rivers. On the other hand, the area on the north to Langjokull is a huge marsh and there is only one way leading through it, which significantly limits the choice of the route.
I have marked my route on the picture (variant no. 4 – 935 km long) together with possible modifications. Of course, “covering” the Westfjords is not obligatory. In order to do the traverse you may want “just” to connect the east and west shore of Iceland, which makes 550-600 km. Snaefellsnes peninsula on the west may also be very nice start or finish (variant no. 5, 700-750 km long).
My route may be modified if you start (or finish) in various point of the eastern coast. Variant no. 7 was covered by Andrew Skurka, who traversed the island in 2008. Variant no. 6 is a hike through the wild terrains of the northern east to Langanes peninsula. You can also finish or start your traverse on the far north, in the area of Hornstrandir (variant no. 8). Finally – if you go the north-south variant or the east-west variant – you can finish or start your walk in Reykjavík (variant no. 9).
For sure this list doesn’t present all possibilities. It shows only the main directions. How to choose from them?
Variant no. 2 may be the easiest, but it leads through the roads used by cars, which may be tiresome. Variant no. 1 is more demanding. Variant no. 3 is the fastest traverse from all of the options. Going east-west requires more time and planning, and it is combined with bigger difficulties (less roads, more paths and sometimes the wilderness, crossing the rivers, long distances with no water). Choose it, if you are sure of your skills and you can survive far away from people.
Time: how much your Iceland crossing will take?
The record holders do the north-south Iceland traverse in 14 days. Walking with normal pace you will need about 3 weeks. Doing the east-west traverse requires 3-4 weeks of walking.
Crossing of Iceland: preparation
Expect the unexpected. Iceland is an unpredictable country. Its weather and location are the reasons, why the country may sometimes be an unfriendly place, where all the elements seem to act against you. On the other hand it may also be wonderful place, offering magnificent views and fantastic weather. It is always worth to be prepared for the worst.
Crossing Iceland is also not an adventure for the beginners. It’s worth to have an experience of few longer trips/thru-hikes, before you start 600 km hike across the wilderness. Doing a few European long distance trails will be a good training, before you appear here.
Iceland: maps and guidebooks
 In Polish mountains I usually use 1:50 000 or 1:75 000 maps. On Iceland, where the terrain is less varied, smaller scale will suffice. The basic map I used, while planning my route, was the 1:425 000 “Iceland”map by Reise Know How. I like their maps really much, they are waterproof, tear-resistant and precise. The scale of my map, enough for general planning of the route, perfect for hiking through the roads and paths of Iceland. I used it during 90% of my traverse.
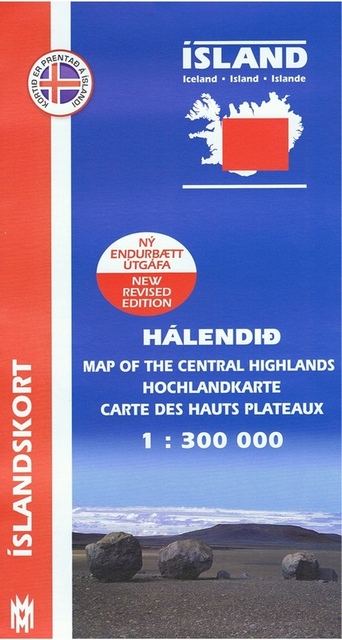
I you plan to use mostly the roads, you don’t need any better map. If you feel like going local paths or the wilderness, you may need something better. The best option will be the MM series maps (navy blue covers with a red stripe) 1:300 000 – they show also small paths and the shape of the terrain is very precise. Four sheets cover the whole country and you can find them in bookshops and tourist information offices in the Reykjavik. If I had to choose only one, it would be the “Central Highlands” sheet.
You will also find some popular areas on 1:50 000, 1:75 000 and 1:100 000 scale sheets, but you probably won’t need such detailed maps.
If you are looking for a simple map to generally orientate yourself, you can use a bicycle map. It is available in a digital version HERE, and every tourist information office in Iceland has it’s paper version.
During my thru-hike I sometimes found old topographic maps useful. I used them in the wilderness and during my walk through the Westfjords, however it is worth to look at them with caution. Roads and paths change, new lava fields appear. lakes change shapes and rivers change their courses. Eventually I could do without these few sheets of paper.
I did not use any paper guidebooks while hiking across Iceland. Instead I browsed through the descriptions of my predecessors (Andrew Skurka, Wazari Team, Rafał Bauer, Alastair Humphreys) and the book “Fight the Wild Island. A Solo Walk Across Iceland” by Ted Edwards.
Before you depart:
1. Iceland can be dangerous and you may find yourself in danger. Therefore it is very important, that you are informed, what is happening in the interior. After landing in Reykjavik visit ICE-SAR, the office of local rescue organisation. You can find their person giving advice in the main tourist information office in Reykjavík, at 2 Aðalstræti Street. Tell them your plans and check if currently there are any dangers in the area you are going to. The rescuers will warn you against the swollen rivers, glacier floods, volcanic activity or a closed road.
2. The second necessary thing to do is to register your hike on the ICE-SAR webpage: http://safetravel.is/. By providing your phone number you enable the rescuers to send you a message concerning any potential dangers in the area.
3. The third thing you should do is to install in your phone the rescue 112 Iceland App, which enables calling for help. In case of danger you just press one key.
Take these three points very seriously. Every year tourists get themselves into troubles as they ignore bad weather conditions or fail to ask the rescuers for information. The rescue teams, even though they will save your life for free, are volunteers. They risk their lives for free.
It is a good option to take a satellite beacon for your Iceland traverse. If you do not have your own equipment, you can borrow it in ICE-SAR. Below there is more information about the equipment.
Staying in touch
Local operator Simmin has the best range of mobile network. I caught quite good range in many places of the interior. Voice connections can be made in over 80% of the country. However, there are some places, where there is no signal – mainly in the centre of the country, where the biggest glaciers are. This is where I relied on the SPOT satellite messenger. Before I arrived ICE-SAR warned me, that due to the fact that Iceland is on the far north, SPOT may work very poorly. It is not true – in the open space the device revived the signal of the satellites fast and with no mistakes. It had some troubles with the reception in very deep valleys and in the cities, between buildings. Garmin InReach or PLB (Personal Locator Beacon) are good alternatives for SPOT. The PLB can be borrowed from ICE-SAR office.
Satellite phone provides full contact for the significant higher price, however. Taking into account quite common access to phones – satellite phone might not be absolutely necessary, unless you go seriously into a wild.
Navigation and marking of roads and paths
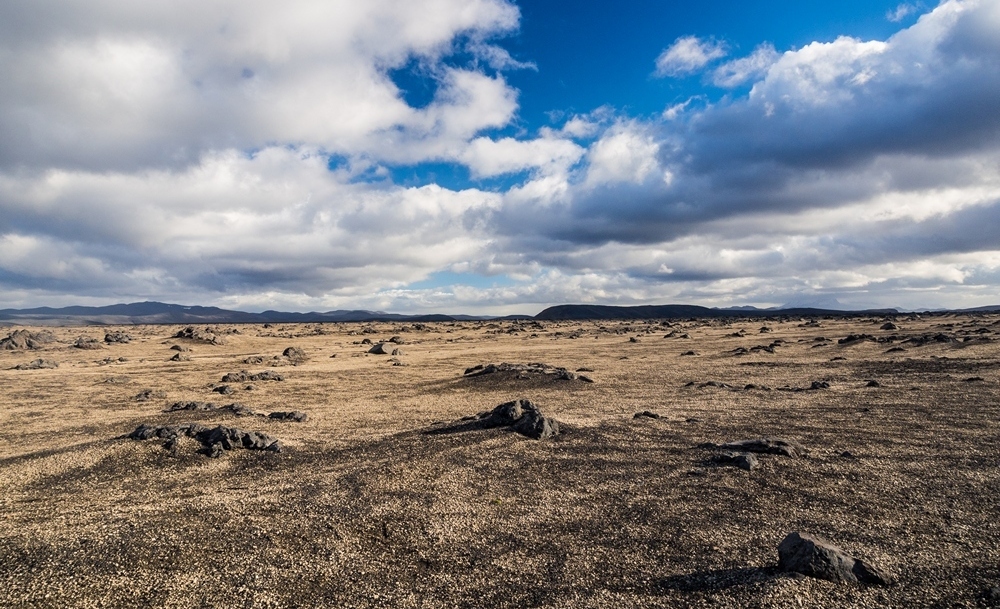
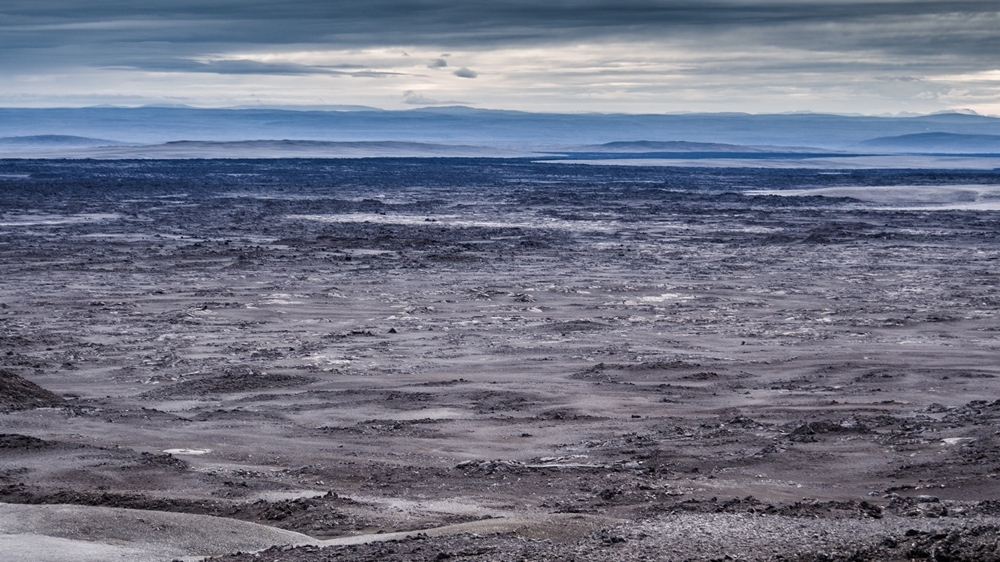
While traversing the island you will probably use the existing network of paths and roads. The ones leading through the interior are always marked with a letter F and a number. “F” roads, mostly covered with gravel and sand, are available for off-road vehicles only. It does not mean that they are easy to walk on. For a long time I will remember a sandy desert, south from Askja, where I’ve walked almost to my ankles in black, basalt dust, blown in on the previous day by strong wind. A typical Icelandic off-road, most often Dacia Duster, comes across the obstacle. For a hiker it takes a lot of effort, before he/she covers a dozen of kilometres in the sand.
In the outskirts of Vatnajokull I was amazed when I saw the terrain marked in the map as a road – cars were going across rock and riverbeds, winding between huge boulders and old lava fields, as you can see in the picture below. It was not a road; it was total off-road, requiring some real acrobatic skills. Icelandic concept of a “road” is sometimes fluid, then.

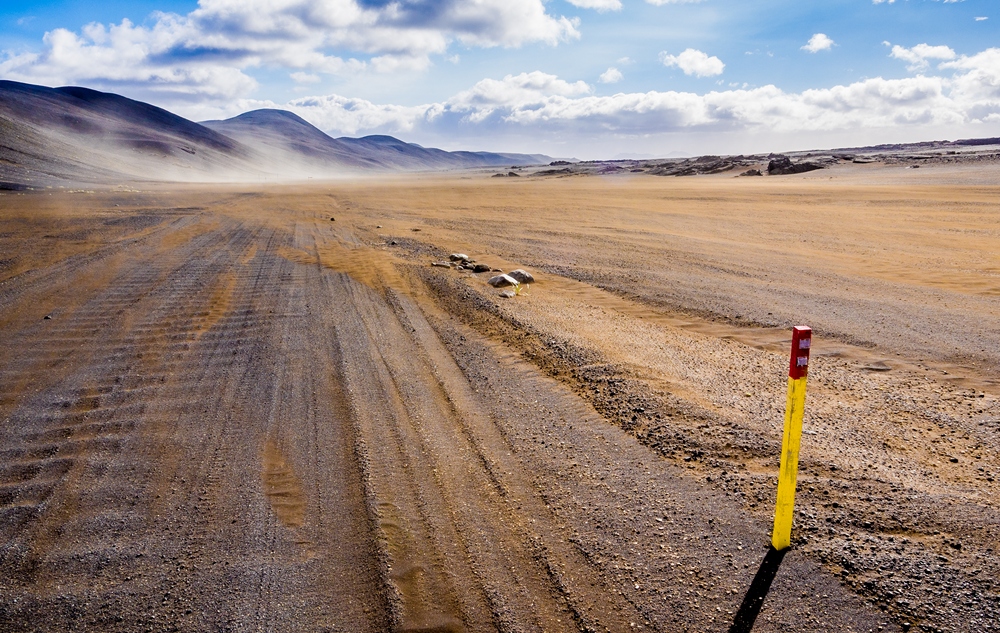
Even in the most distant corners of volcanic wilderness, roads across the highlands will be regularly marked with yellow stakes. There will be also bright yellow signposts on the crossroads. Therefore it is difficult to get totally lost. Fording a river poses much more difficulties.
Many paths in the interior are also marked; it is not a rule, however. It happened to me a few times, that I walked the empty trails with no stakes. Old traces left by vehicles and people were very clear, but you needed to be careful. In fog or in the darkness you may get lost.
Open landscape of Icelandic highlands enables you to navigate easily, but be prepared for surprises. While walking north from the Langjokull glacier, I’ve been looking for a lake, clearly shown on the map. In the end, just before the dusk, I found it. The road should lead next to its shore. Instead, it passed the lake in the distance of 2-3 kilometres. As I reached “my” lake I realised, that it changed its shape. The river running from the glacier dried up and the lake shrank so much, that this night I could camp on its dried-up bottom. There were more surprises of this kind and usually they were caused by the changeable nature of the glaciers. Some of their areas melt faster, others slower. Rivers, streams and lakes change their shapes and the roads and paths change their courses. Therefore don’t trust old maps and check your location regularly.
Huts, shelters
In the highlands tent is necessary – there are no natural shelters and the ones built by humans are scattered too sparsely, to sleep in them every night. However, you can spend some of the nights under a roof.
You will find huts next to the main “F” roads in the highlands. Usually car groups come there and book the places in advance, so there may by little chance for accommodation. However, you can put up a tent close to the shelter and take advantage of a dining room and the shower. Accommodation cost is about 5000-7 000 ISK, putting up a tent – about 1400-1800 ISK. The shelters visited most often, situated on the routes across Iceland, are: Dreki (close to the Askja volcano), Herdubreidarlindir (at F88 road), Nyidalur (at F26 road), Landmannalaugar (on the south of the country), Laugafell (close to the Hofsjokull glacier), Kjolur (at F35 road). In the shelter you will always meet a ranger, who can provide you with all kind of information. It is worth to talk to him/her, because a person who spends there the whole summer knows the area like the back of his/her hand. Information given to me by the guards in Nyidalur and Laugafell was crucial to safely avoid the glacier rivers in the centre of the country. In major huts (lika Dreki) ICE-SAR rescue teams are also located.

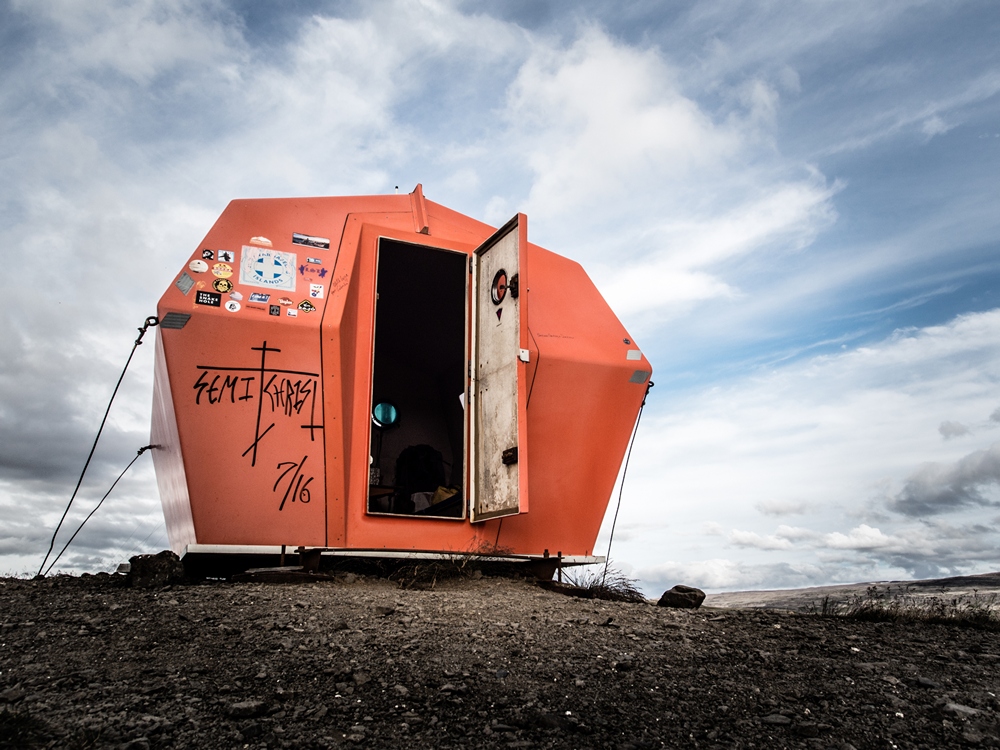
Besides the manned huts, in Iceland there are also unmanned rescue shelters. It may be solid and cosy house, usually close to a road in the middle of nowhere. Sometimes it is a shabby, ramshackle house with a lot of litter. The shelters are open and sometimes are equipped with a radio. You should sleep there only in emergency situation. In practice tourists sometimes use the shelters when they are alone in the wilderness. However, there is one simple rule: you leave the shelter in such a condition as it was, when you entered it and you don’t use any fuel, unless you are in danger of hypothermia. The friendliest cottage of this type Kistufell hut, north to the Vatnajokull glacier – if you plan to follow variant no. 1 or 4. , you will pass it on your way.
The last category is rescue shelters built at the shores, for any potential castaways. They are usually solid houses with places to sleep inside, a wood or fuel stove, sometimes with emergency supplies of food and clothes. The rule is the same – you don’t use anything, unless you’ve survived had an accident
During 4 weeks of my journey I stopped to rest in shelters few times, however for lunch/dinner brakes. Only during one night I slept in one of them, escaping from the wind at the remote coast of Eastern Fjords.

Crossing Iceland: rivers issue
Rivers in Iceland will greatly shape your route. Plan your hike in a flexible manner and adjust it to the circumstances.
Before start I visited the ICE-SAR rescuers in Reykjavík and asked them about the possibility to use the path, which goes around the Hofsjokull glacier from the north. They said that it might be problematic: Blanda River, which leaves the glacier to the northwest, is very risky to cross it due to the swollen waters and quick sands. On my map I found a chance to cross Blanda by the old shepherd’s route, but before I decided to go there, I asked the rangers in Nyidalur and Laudafell for advice. They asked me not do go there. While it was true, that I could try to cross Blanda, the main challenge awaited later. The next river would be Vestari-Jokulsa, deep and fast, which even the biggest off-road vehicles couldn’t cross. The depth of the ford was 150 cm – trying to cross it while walking would be dead sentence.
With this information I hiked 40 km to the north, to the dam, that let me safely cross Blanda and Vestari-Jokulsa. It cost me nearly two day extra, but was the only solution.
To explain it clearly: in the rapid Icelandic river, knees-deep water is enough to knock over a strong man. Waist-deep water is practically impassable. If it is 150 cm deep, it is going to carry you away in the blink of an eye and cause a death of hypothermia (after all it has just run from a glacier) or at the best, it will carry you kilometres away. Every year crossing the rivers causes accidents among tourists, also the ones in cars.
If you are travelling on your own, the risk is automatically bigger. If you get carried away by the river, nobody is going to rush to help you or call for the rescue.
If you cross a river in Iceland, do not be reckless. If you have any doubts – wait for a passing car. If you do not know the water level – ask local rangers and ICE-SAR rescue teams. They are the best advisors.

Food and supplies
Supermarkets in the cities are the best source of supplies. Prices in Iceland are high, but don’t panic. You can buy the basic products in decent prices, similar to the ones in Western Europe. Apart from Reykjavík you can find some well-supplied shops in other bigger cities: Akureyri, Borgarnes, Stykkisholmur, Egilsstadir, Hofn, Budardalur and a few others. Besides them supplying youself may be difficult.
Do you need to have food supplies for your whole journey then? Luckily – no. The hostels you are going to pass on your way will be your help. They offer a possibility to send some food deposit for those, who do the Iceland crossing. While hiking near one of them you can pick it up. In separate article I write in details about how to arrange deposits.
Water
Water in Iceland is excellent. I’ve been drinking it many times directly from the streams, springs, and rivers, and even from the lakes, where the water is still, with no consequences at all. Of course it is better not to use water, which runs through pastures or pass settlements. However inside the Iceland it is everywhere and doesn’t require purifying.
However, there are some places, where you won’t find any water. The most important one, against which a guard will probably warn you, is the region of a basalt desert on the northern outskirts of Vatnajokull glacier. The waterless area begins after Askja and continues to Kistufell volcano. It’s about two days walk with no access to water. Although you are going to pass the overflow areas of Jokulsa-a-Fjollum, water in the river is full of sand and dust, and it is not drinkable unless you filter it somehow. Even if you manage to do so, to cross the dry area takes at least one day and a half of walk. Some off-road vehicles will probably pass by, but it is worth to have your own supplies.
Usually there is too much than too little water on Iceland, but be ready for surprises and have a little water reserve in your backpack.
Money
Bus transfer from the capital to the east of the country costed me about the same as Warsaw – Reykjavík plane ticket. It says a lot about the cost of living in this country! But to stay sane, you have to stop thinking about money all the time. If you are on a tight budget, try hitch-hiking and sleeping in a tent. It is worth to enjoy the country, therefore don’t fight for every króna. Let your travel be a memorable experience, not only a fight with prices.
How to live on a tight budget on Iceland? During your hike you will not have many opportunities to spend money. In the highlands there are simply no places to spend it. Have about 30 000 kronas for unexpected expenses, while entering the inner part of the country and that is all you need. The best places to buy food are supermarkets: Bonus, Netto, Kronan. Small shops will be more expensive.
The overall budget of my journey, including the costs of transport from Poland, amounted to ca. 1 000 EUR. I spent 250 EUR on plane tickets and 250 EUR on bus transfers. I spent the remaining 500 EUR on food, 2 nights in hostel, 2 nights on camping grounds and some other small expenses. Taking into account that I spent nearly six weeks on Iceland, it’s pretty small amount of money.
Language
Everyone, I dare to say with no exception, speaks English. Usually on a very good level. Moreover, the number of tourists coming to Iceland every year makes it very probable, that people you’re going to talk to will be foreigners. During few weeks of my stay I didn’t have to use Icelandic at all.
Safety. Solo or in a team?
Many hikers who cross Iceland walk lonely, which doesn’t make rangers and rescue teams happy. Unfortunately, the more guests come to their country, the more often they encounter cases of – sorry to say – irresponsibility. Famous story of three young men, crossing the Iceland in winter, caught a lot of attention. They were saved from troubles by the rescue three times. In the end some members of rescue team – which I met later by accident – wanted to gut them alive.
Tourists crossing the streams get carried away by the water. Cars get dug in snowdrifts or they are carried away by rivers. The weather is unpredictable. When you are alone in the wilderness of Iceland, the risk of an accident increases; therefore mistrust of the Icelandic rescue members is understandable. Additionally the route that I’ve chosen was very unfrequented. During 28 days of my march I was passed by hundreds of 4×4 cars and only three hikers, who, by the way, have walked north – south. Nobody walked with me. I tried to prove to concerned rangers, that I am careful, have satellite connection and the necessary equipment, and I’m capable of finishing my walk. Still, it was crucial to regularly consult my route with them.
In Nyidalur hut, while discussing further route, a guard asked me to leave her my phone number, giving me her number in exchange. I advise you to do the same and write down some contacts to the local rangers: in case of necessity they are the fastest to come and help you. When I left the highlands after a few days and went down to the coast, I was able to send a message to the guard: “everything’s fine, thanks for help”.
Alone or in a team? There’s no one good answer. I personally think that a well-prepared, solo adventure doesn’t need to be more dangerous than with a team. Being on my own mobilises me and makes me more careful. If you feel, that a lonely adventure in Iceland suits you, just go for it. Again – solid experience goes a long way.
I’ve heard from a few hikers, that a lonely march across Iceland has touched them deeply. After many lonely days they’ve felt uneasy, strange and had enough of walking. Indeed, Iceland is empty and that emptiness might be overwhelming. However, I enjoyed it and I felt very well with myself till the very end. It is a matter of personality. Crossing Iceland means risk, but an experienced person should cope with it.
If you have an accident during your lonely journey, remain calm and call for help via your phone or SPOT. If you can’t – wait patiently. The roads and paths in Iceland are in use and even in places where people are rare, you will finally meet somebody – but it may take quite a long time.
Insurance
Spine injury in Iceland was my first accident during my travels. It was sudden and required a medical visit. Its cost was irrespective of the type of injury: only registering in hospital and brief medical consultation, an injection and two pills costed me nearly 60 000 ISK (500 EUR). I had also to pay for the bus to Reykjavik (120 euro) and medications (20 euro). Without insurance I would have to pay for everything out of my own pocket.
If you live in EU, take to Iceland your European Health Insurance Card. When you have it, you can take advantage of healthcare facilities the same way as Icelanders. However, remember, that your country’s national health insurance may not cover all medical services. It also does not cover medical transport to your country. If your journey is connected with risk of any accidents, consider having additional insurance, which would cover rescue action costs. ICE-SAR rescuers in Iceland work free of charge, but evacuation by helicopter from an inaccessible place may cost you hefty amount.
Crossing Iceland becomes more and more popular challenge and you won’t be the first or the last one to do that. You have quite a big chance to meet hikers on similar challenge. However, it does not make the difficulties any easier. If you go between the extreme points of the North and the South, you have to cover 600 km of wilderness and poor roads. You have also 3 weeks of marching in very changeable weather. Even in the middle of summer you can face downpours, snow, fog, strong winds and sandstorms. Crossing the Iceland is never easy and don’t take this challenge light-hearted.
If the direction you choose is different than the popular north-south route, remember, that you will be alone. If you encounter any troubles you will need to rely on yourself.
The basic rules:
- be prepared for difficult conditions, have clothes suitable for bad weather, a tent and a sleeping bag,
- check the route, its dangers, key places and possible shelters,
- remain in touch with rescue teams, send them your itinerary before your departure,
- regularly consult local rangers and rescuers, who know the area,
- do not play a hero, when the conditions are beyond your capabilities and don’t be afraid to change the route if it is necessary,
- again, do not play a hero with Icelandic glacier river.
Good luck!

![[🇬🇧 BELOW 👇] 🇵🇱 Mój najnowszy towarzysz lodowcowych i wysokogórskich przygód - plecak Guide 34+6 od @deuterpolska . Przez ostatnie lata szukałem takiego niewielkiego modelu, które były dobrze usztywniony na plecach i pozwalał przenosić dzięki temu większe odciążenie. Idealny do wejść na szczyty typu Kilimandżaro, Cotopaxi lub Aconcagua, gdzie zabieram podstawowy szpej, puchówkę, termos i dużą apteczkę dla całego zespołu. Czasem także linę i dodatkowy czekan.
Jego świetną cechą jest dostęp przez szeroki suwak od frontu. Pozwala mi on, np. szybko sięgnąć po apteczkę znajdującą się na dnie.
Na lodowcach Islandii nosiłem w nim wygodnie 10-12 kg. Używam go bez klapy, ale obowiązkowo z usztywnianymi plecami, co pozwalam wygodnie przenosić duży ciężar na biodra.
My newest companion for glacier and high-altitude adventures - Guide 34+6 backpack from @deuterpolska . For the past few years, I’ve been looking for a compact model that provides good back support and, as a result, allows me to carry a heavier load. It’s perfect for mountains like Kilimanjaro, Cotopaxi, or Aconcagua, where I carry essential gear, a down jacket, a thermos, and a large first-aid kit for the whole team. Sometimes I also carry a rope and an extra ice axe.
One of its great features is the wide front zipper. It allows me, for example, to quickly reach for the first-aid kit at the bottom.
On Iceland’s glaciers, I comfortably carried 10–12 kg in it. I use it without the lid, but always with the stiff back panel, which allows me to comfortably distribute the heavy load to my hips.](https://lukaszsupergan.com/wp-content/plugins/instagram-feed/img/placeholder.png)
6 Responses
Thank you so much. Very informative. It’s really helping me in planning for my own Icelandic adventure.
Thanks a lot. One of the best-written guides I ever read.
Awesome description. Thanks a lot!!
Thank you Lukasz, very informative and useful!
Thank you for such, helpful information! I am planning a thru-hike myself (hopefully variant 1) and all info is priceless!!
P.S. I recently completed the T.A. in New Zealand and would be glad to help with info on that if you ever consider doing it!!
Hi Diarmuid. Could I ask where and how you sent your food deposits doing version 1?
Thanks
Mark